[2024] How to Replace Your Track to Fit the Snow
Welcome to the Yarbo Track Replacement Guide. This guide provides a step-by-step process for safely removing and replacing the tracks on your Yarbo Core. By following these instructions, you can ensure a smooth and safe replacement process without causing damage to the Yarbo. Please read each step carefully and follow all safety precautions.
Pre-replacement caution:
Before starting the track replacement, make sure all modules are securely detached and the Yarbo is powered off to avoid any accidental movement. Additionally, the inside of the new track is pre-lubricated. Take care to avoid getting any lubricant on the outer surface of the track during installation, as this may cause slippage.
Before: Remove existing modules
Begin by removing the Snow Blower Module or any other attachments connected to the Yarbo Core, as per the disassembly instructions provided in the module-specific guide. Once all modules are removed, flip the Yarbo Core so that the side with the track faces upward and is perpendicular to the ground. This position will make it easier to access and work on the track assembly.
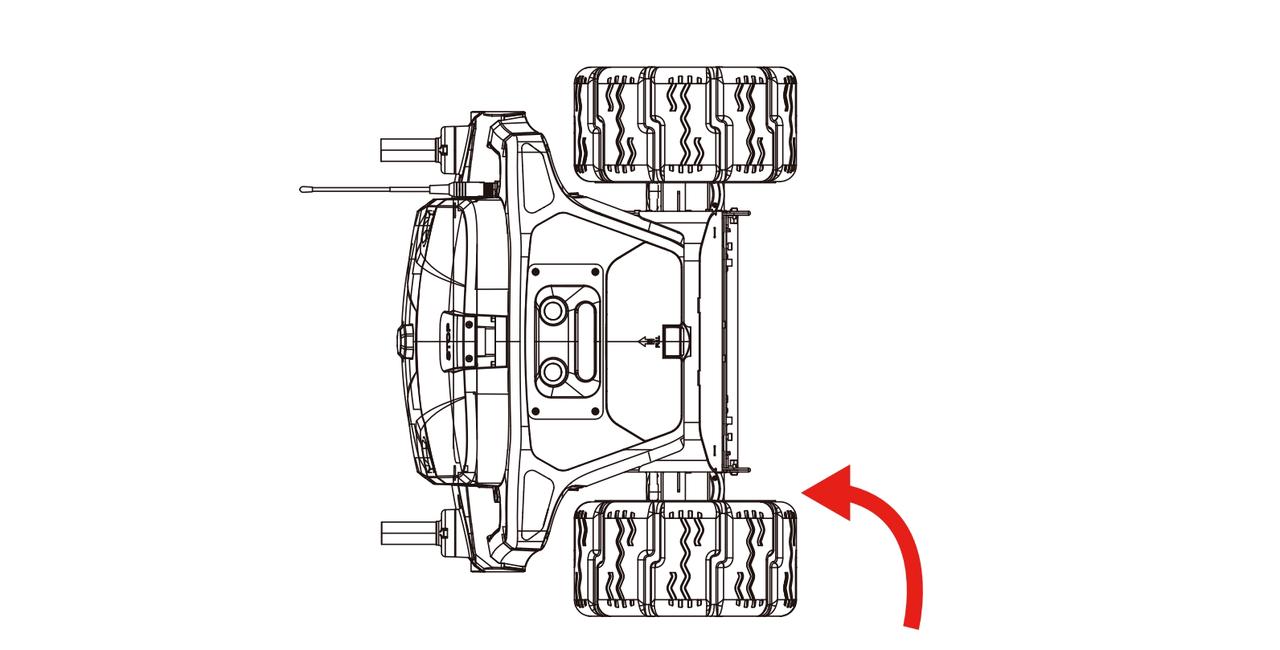
Step 1: Remove the side panel
Using Allen Key #2, unscrew and remove the side panel that covers the track assembly. Ensure all screws are completely loosened and store them safely for reinstallation later.
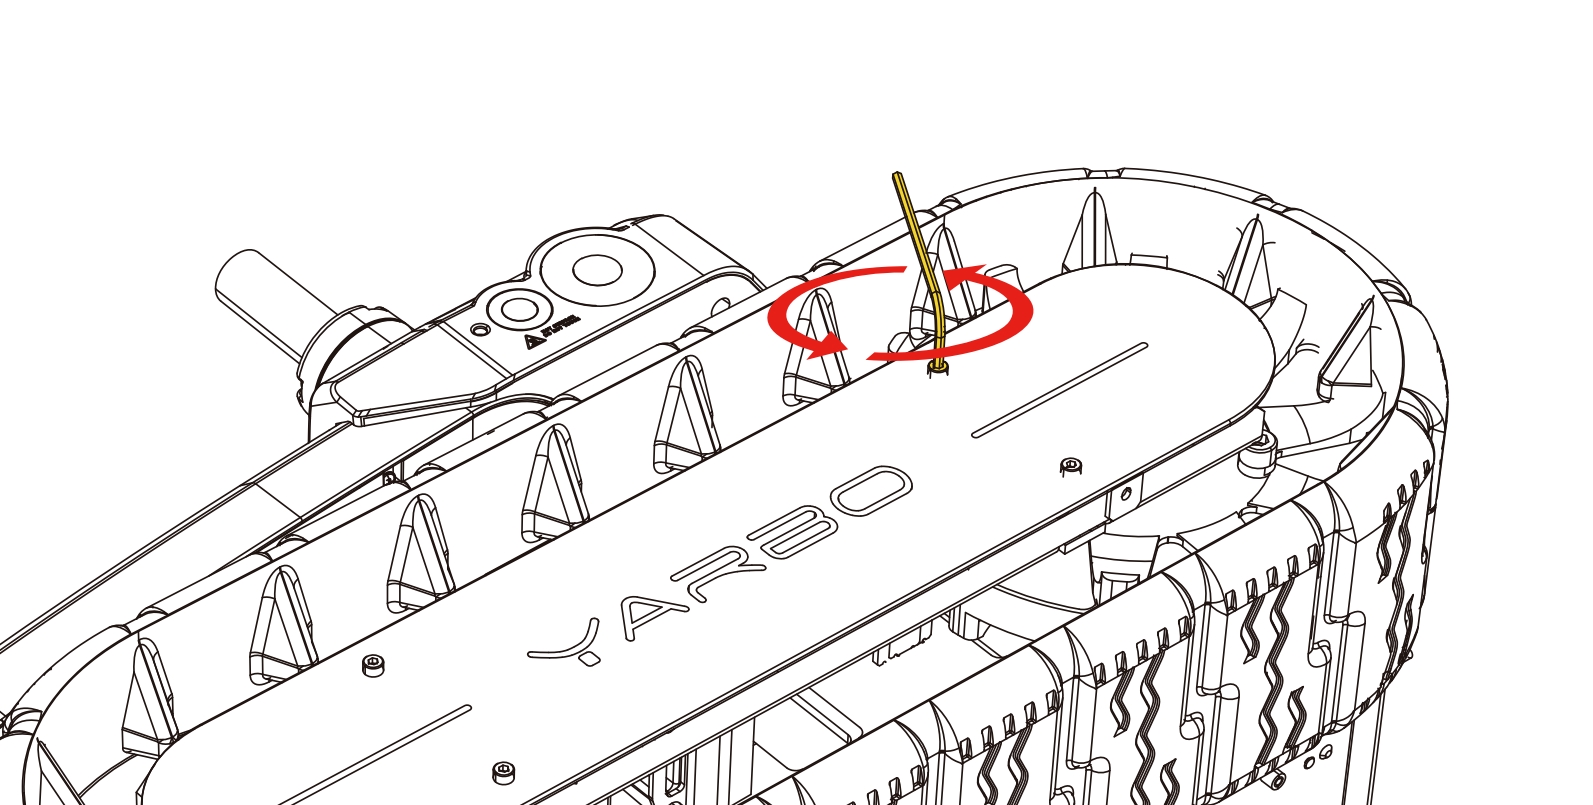
Step 2: Loosen the track fixing structure
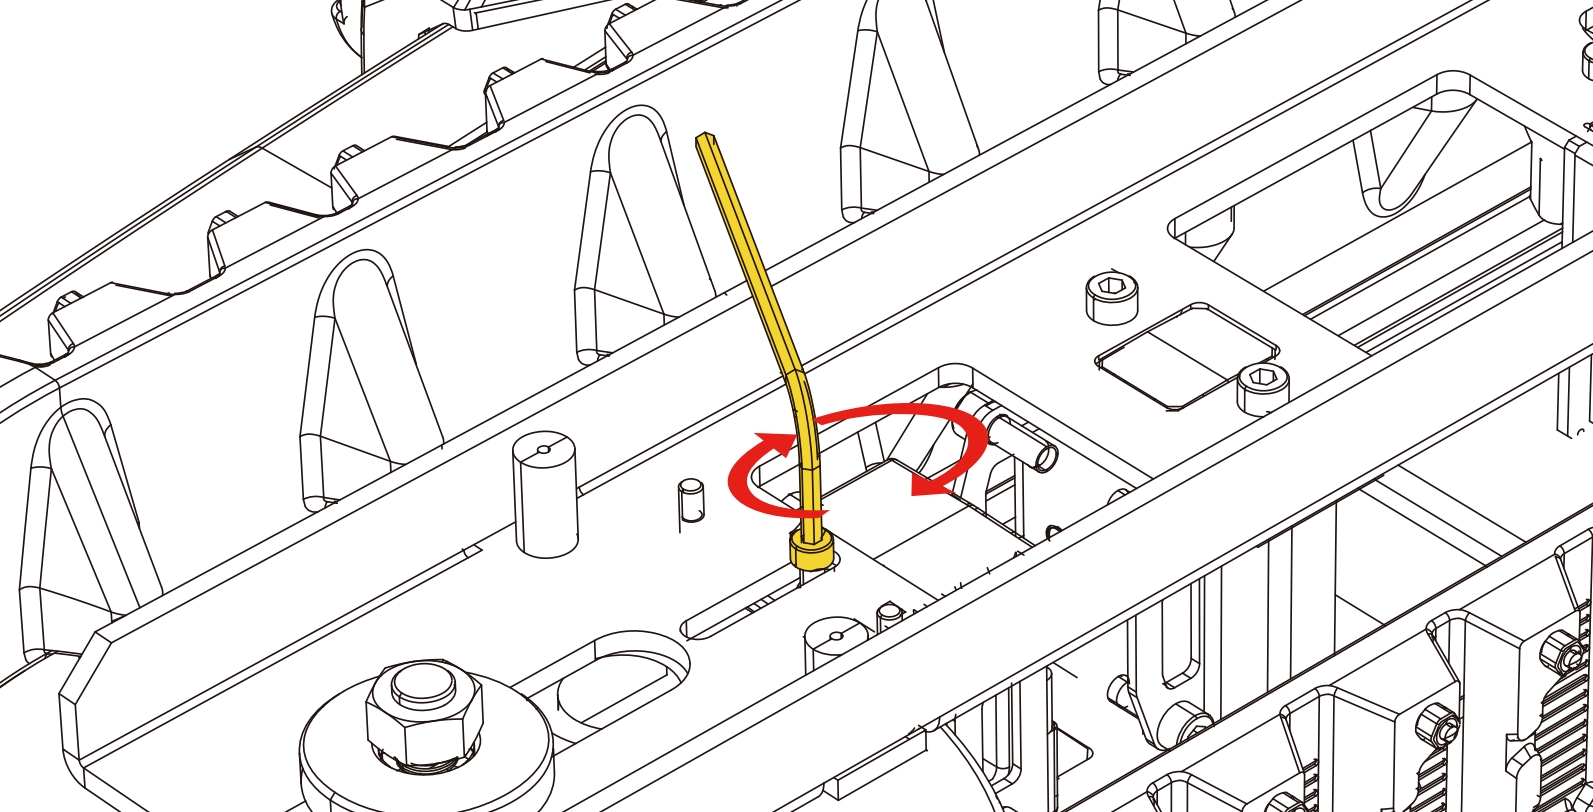
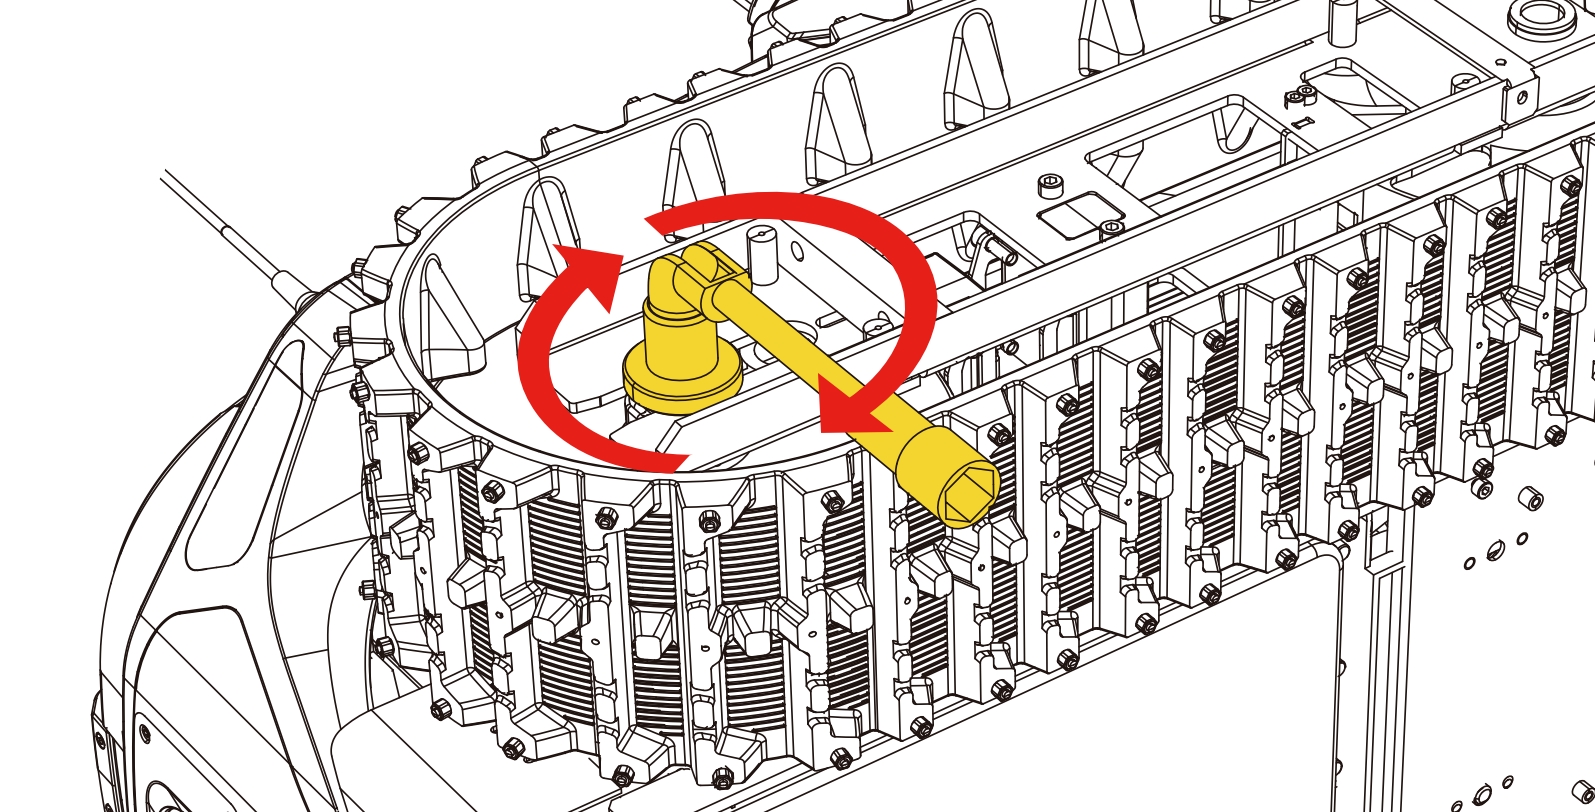
Using an L-shaped socket wrench, carefully loosen the screws, securing the track fixing structure. At this stage, avoid fully removing the screws, as this step is intended to remove the nuts.
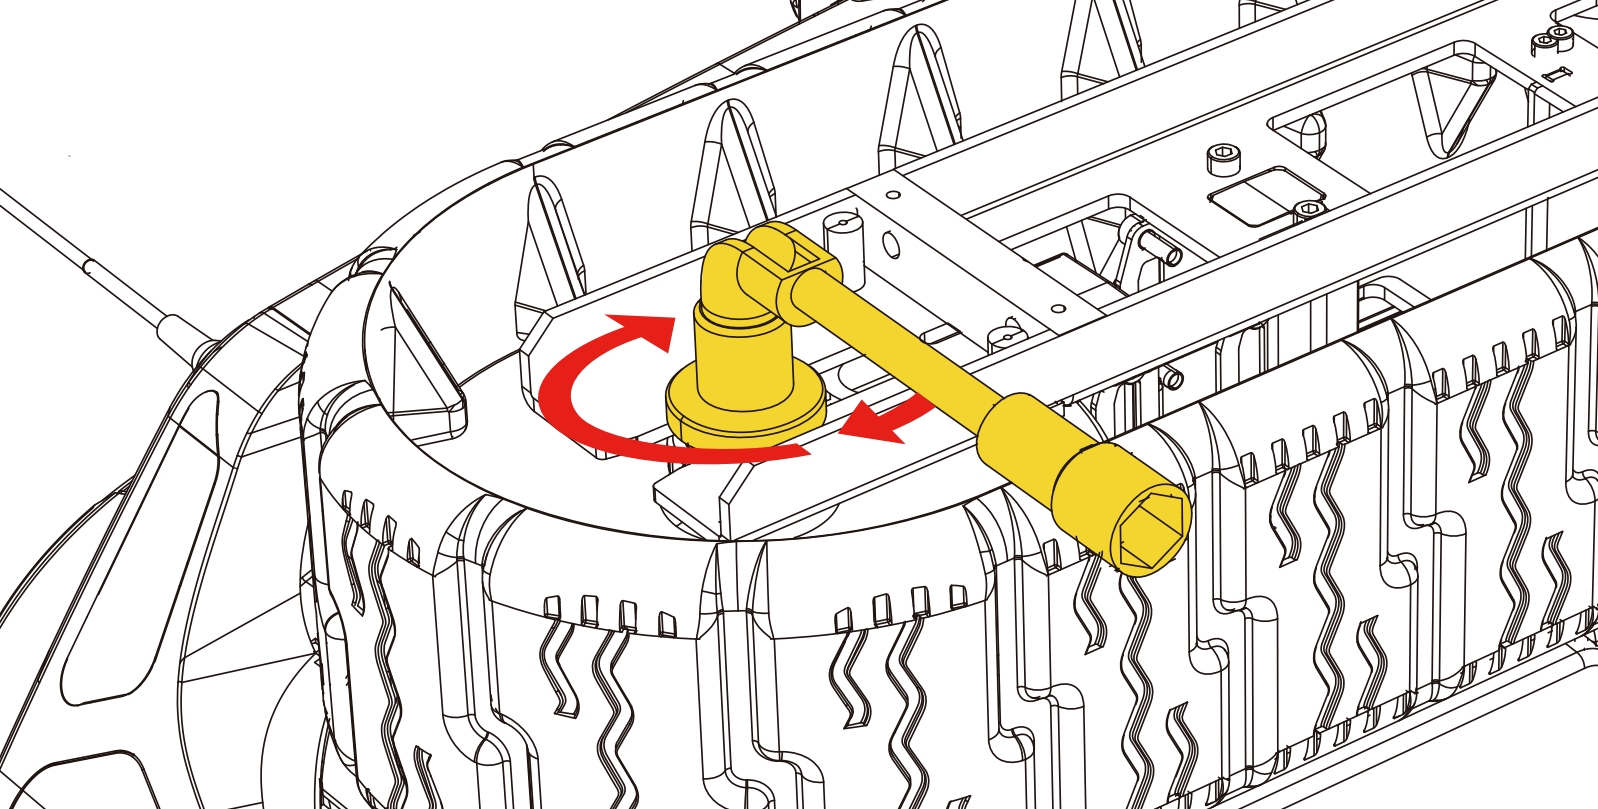 This will allow some flexibility for the next steps.
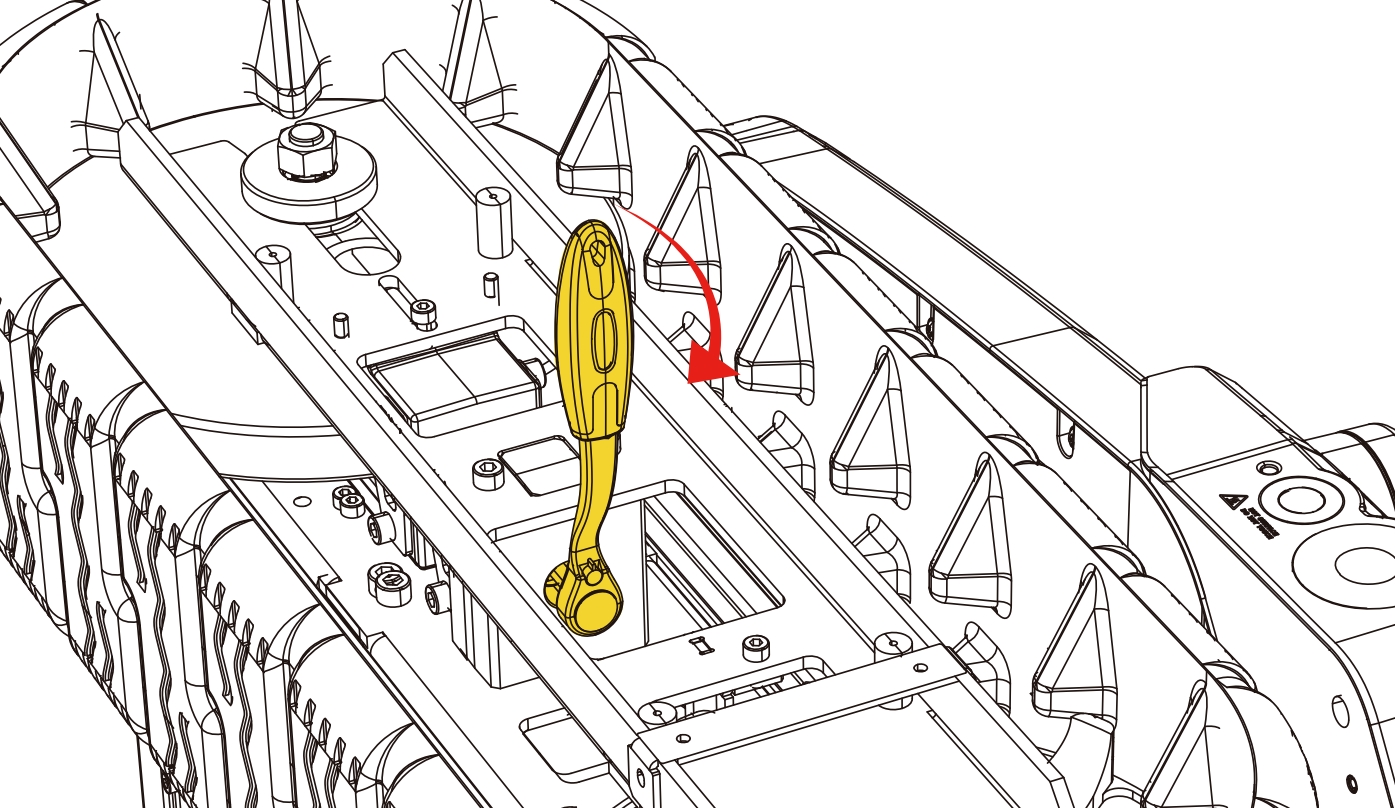 This step will help release tension in the track
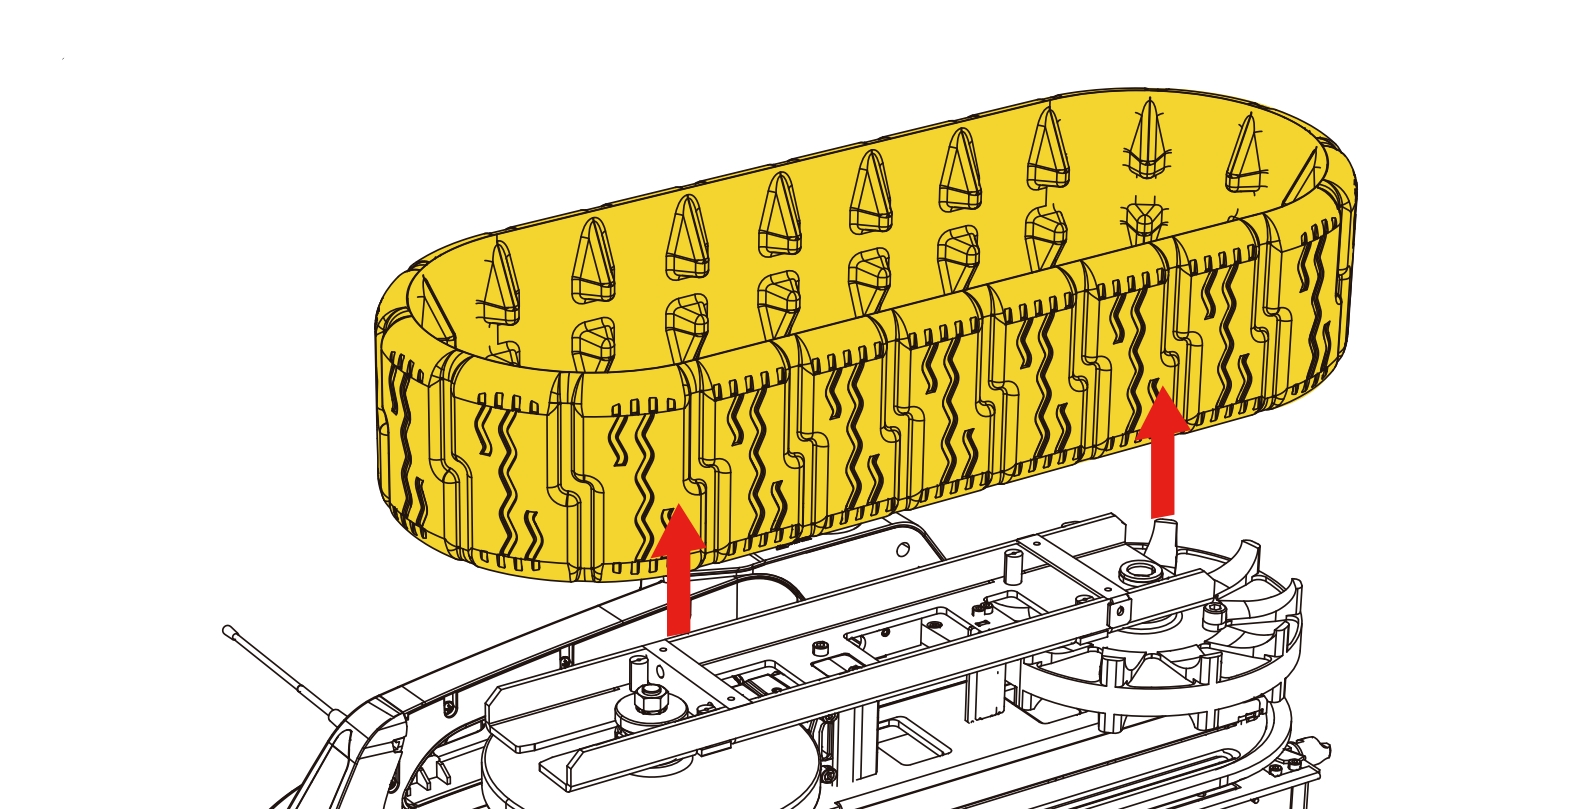
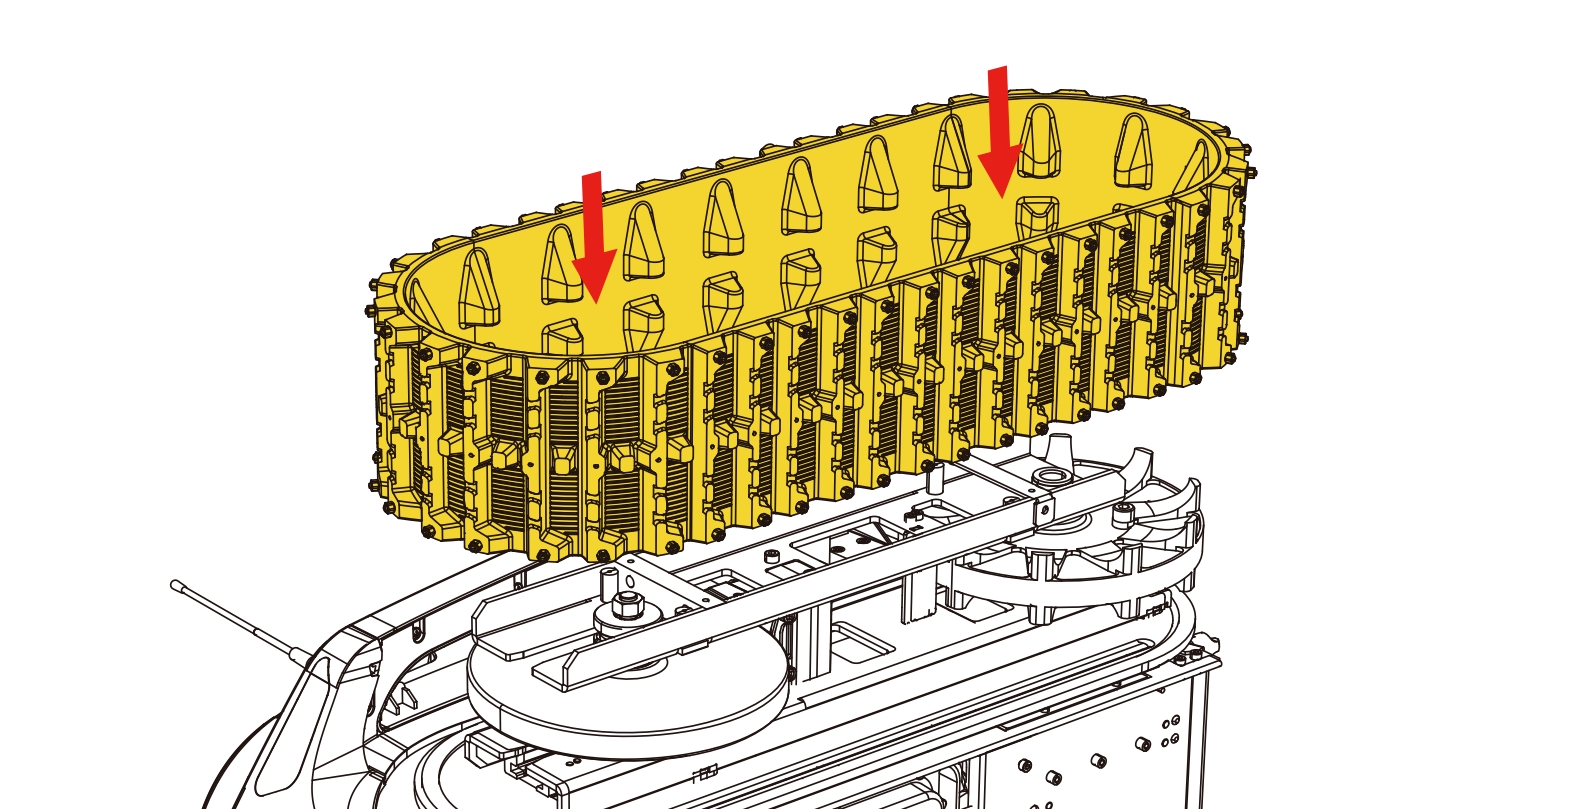
Step 3: Remove track fixing screws
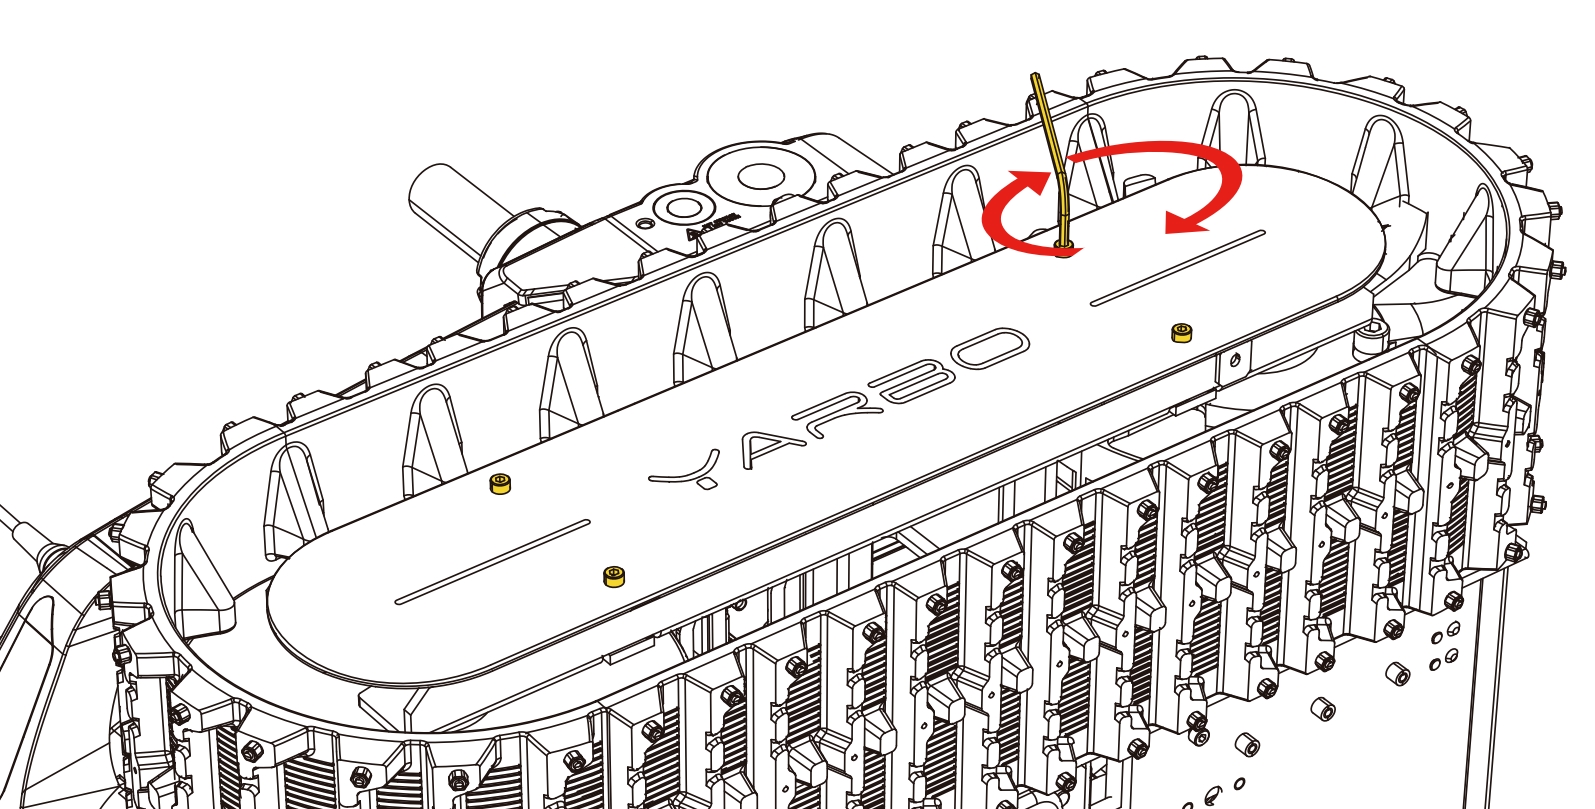
Next, take Allen Key #3 and fully unscrew the track fixing structure. Make sure to set these screws aside safely.
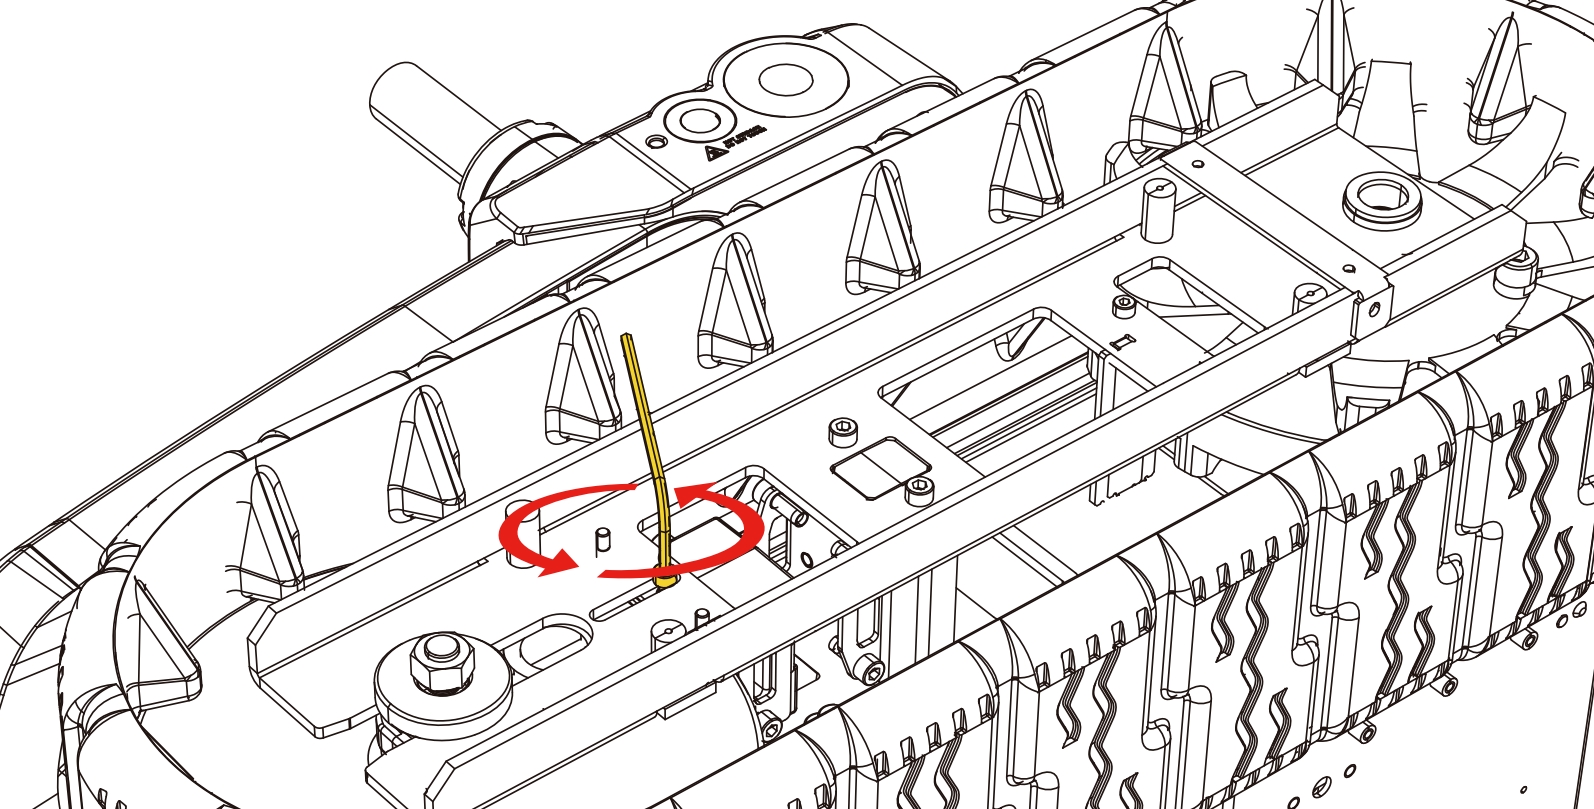
Step 4: Loosen track fixing structure
Using the track wrench, loosen the remaining screws that hold the track in place, do not remove the screws completely yet.
Step 5: Remove the old track and install the new snow track
Now, carefully remove the old track from the Yarbo Core. If you encounter difficulty, repeat steps 4 and 6 to further loosen the screws and adjust the track tension. Once the old track is fully removed, install the new snow track in the same position, ensuring it is aligned as shown in the diagram.
Please be advised that it is essential to distinguish the correct track orientation when replacing the tracks. The diagram below illustrates the method for determining the track direction. Kindly pay close attention to this detail.
Step 6: Tighten the new track
Just as during the removal process, use the track wrench, Allen Key #3, and L-shaped socket wrench to securely fasten the screws of the track fixing structure. Ensure all screws are properly tightened, and remember to use the L-shaped socket wrench to reinstall the nuts, maintaining the integrity of the track installation.
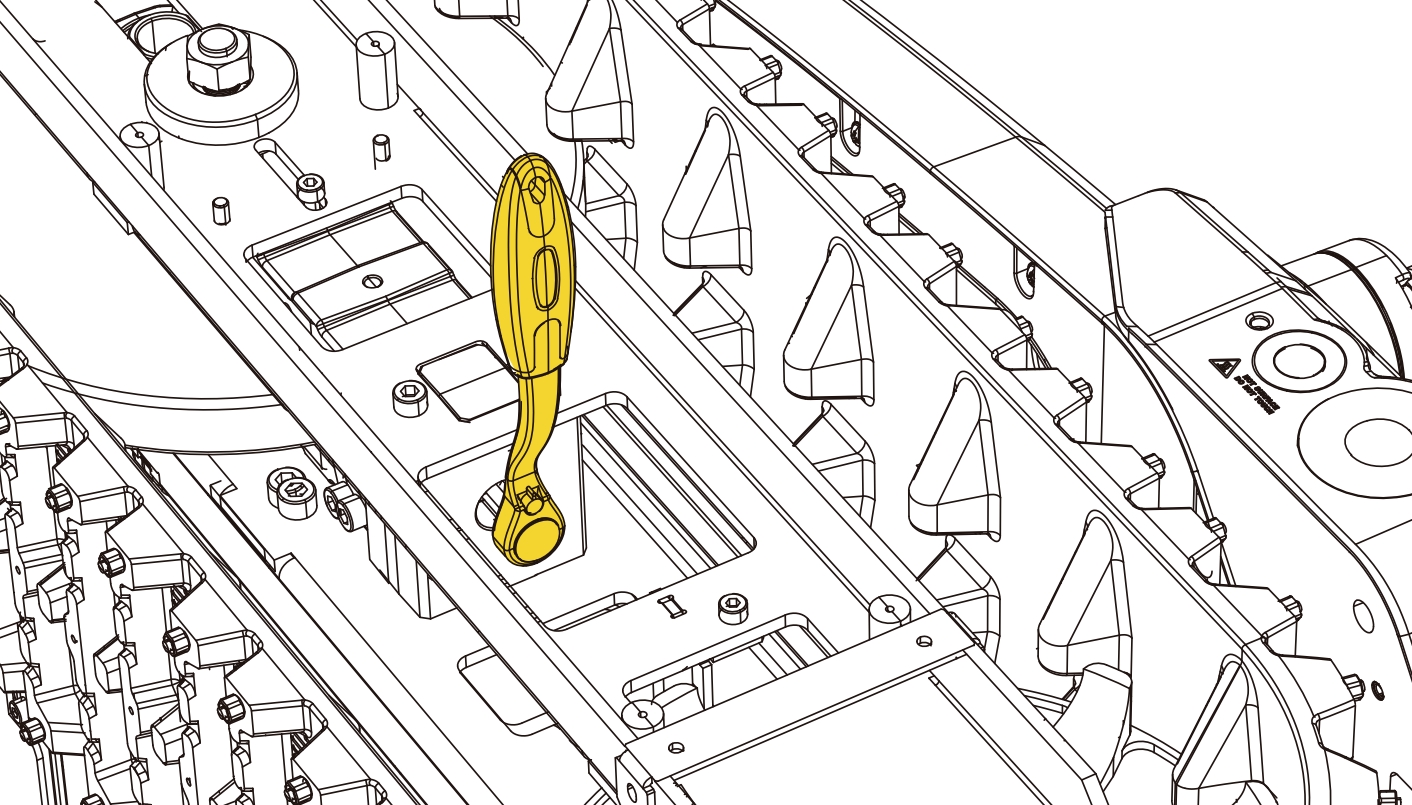
Step 7: Reattach the side panel
Reinstall the side panel and use Allen Key #2 to tighten all the screws that secure it. Ensure the panel is firmly attached to protect the track assembly.
Congratulations!
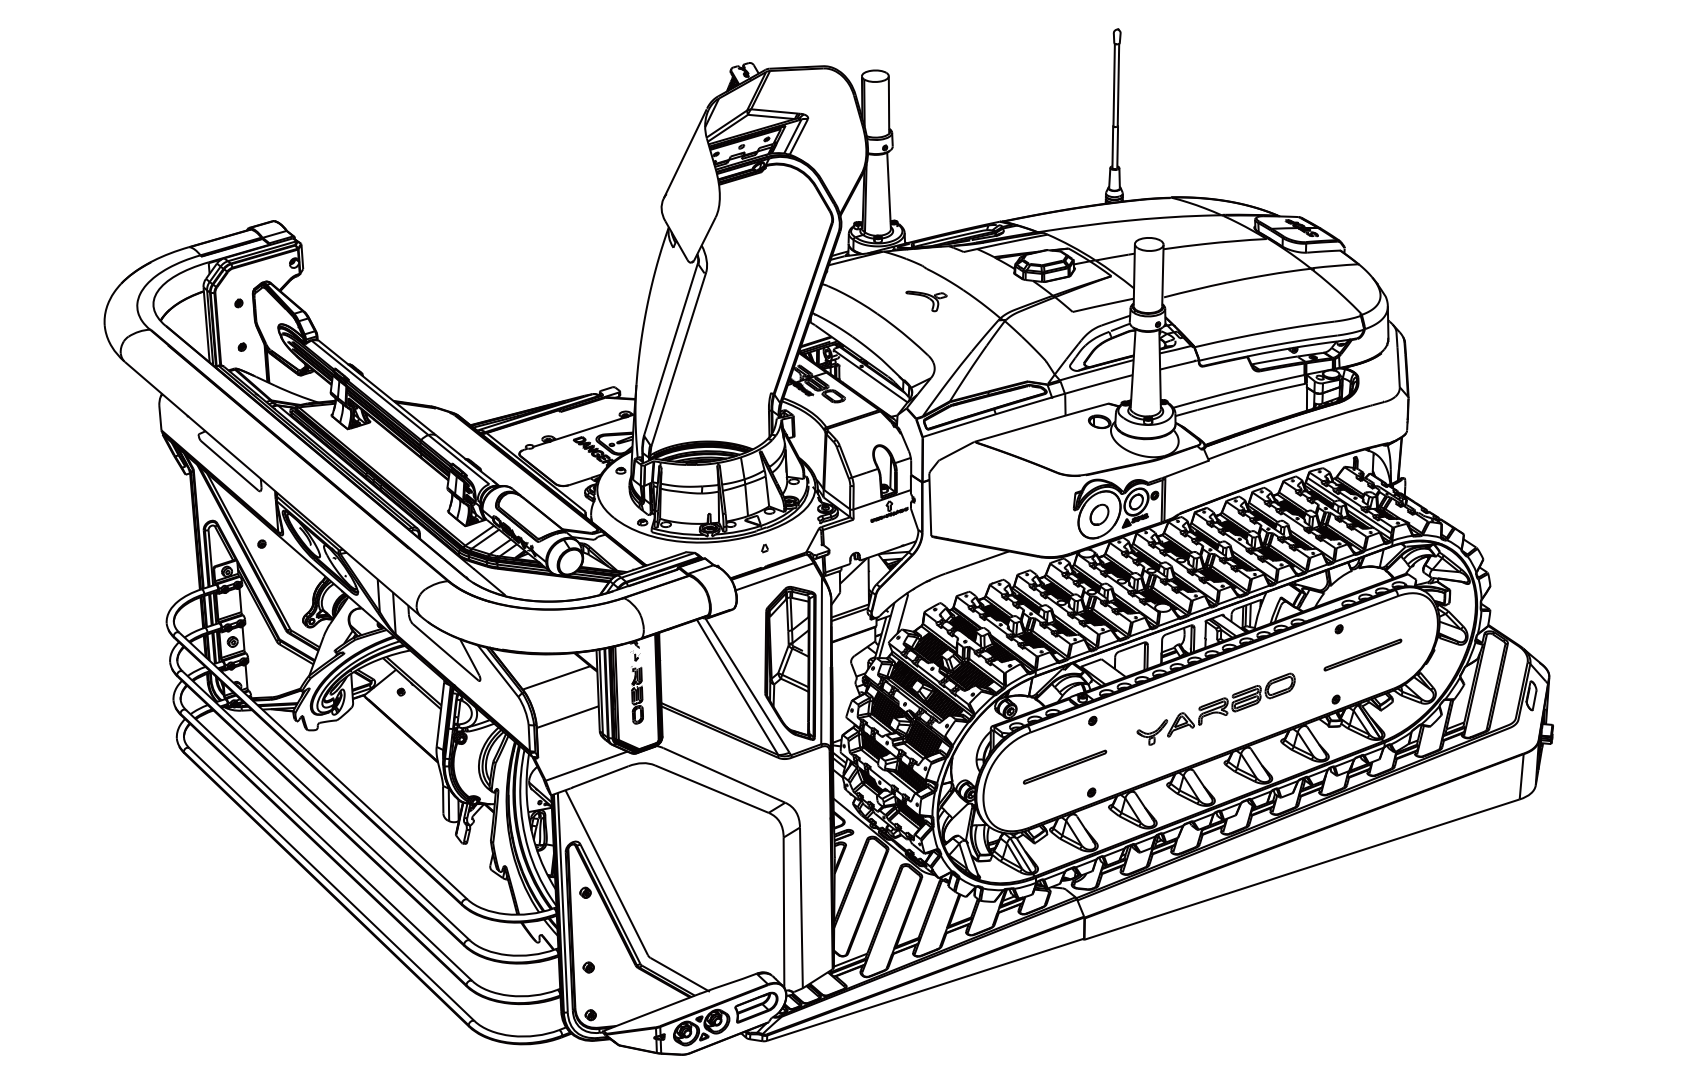
You have successfully replaced the tracks on your Yarbo Core. Please ensure all components are securely fastened and there is no loose hardware. After completing the replacement, check the track tension and alignment before using the Yarbo. If you encounter any issues or the track feels misaligned, refer back to the guide or contact customer support for assistance.
Safety Notice: Always make sure the Yarbo is powered off and disconnected during the replacement process to prevent any accidental movement or damage.
Related Articles
[2024] How to Replace Track Side Plate
Purpose of the Track Side Plate The Track Side Plate is an important component designed to prevent snow from accumulating inside the tracks and reaching the motors, which could lead to operational malfunctions during snow removal. Your Yarbo Core ...[2024] Yarbo Snow Blower User Manual
Note: This page is part of our legacy support content. Yarbo’s Knowledge Base has now moved to the new Yarbo Wiki. To access the latest user manual for the Snow Blower and stay up to date with all features and guides, please visit the Yarbo Wiki: ? ...[2024] Yarbo Snow Blower Quick Start Guide
Please download the attached file for the Quick Start Guide of the 2024 Snow Blower Mower.[2024] Replace Data Center quick guide
Follow these simple steps to replace your Yarbo Data Center efficiently: In Yarbo Settings, click Replace Data Center.Notice:Your map data will be erased when you perform this action. Install Data Center according to the instructions in the User ...[2024] How to Avoid Freezing Tracks on Your Snow Blower
Winter weather can be harsh, especially for those responsible for keeping walkways and driveways clear of snow. One common issue faced by users of snow blower, Yarbo, is the freezing of tracks after extended periods of use. This article will guide ...