[2024] How to Disconnect the Snow Blower Module?
Welcome to the Yarbo Snow Blower Module Removal Guide. This guide provides a step-by-step process for safely removing the snow blower module from your Yarbo Core. By following these instructions, you can ensure a smooth and damage-free removal process. Please read each step carefully before proceeding and take all necessary safety precautions.
Pre-removal caution: Before starting the removal process, ensure the Snow Blower Module is positioned such that its surface is in full contact with the ground and the Yarbo is turned off. This prevents accidental falls and damage during disassembly.
Step 1: Unlock the latches
First, locate the two latches connecting the Snow Blower Module to the Yarbo Core body (as shown in the image). Lift these latches to disengage the lock, putting the module in a removable state.
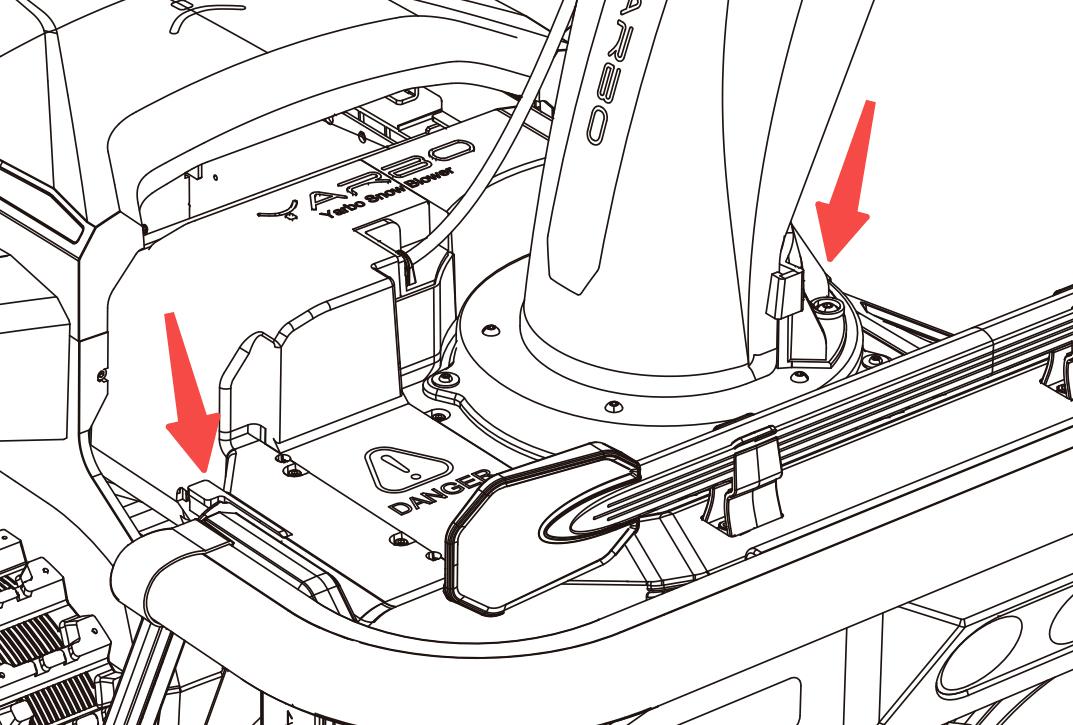 These latches need to be lifted to release the locking mechanism, enabling the module to be detached safely.
Step 2: Remove the module
Firmly grip both handles on the sides of the Snow Blower Module. Gently lift and detach the module from the main body of the Yarbo Core, ensuring the protective cover with the Yarbo logo becomes fully visible.
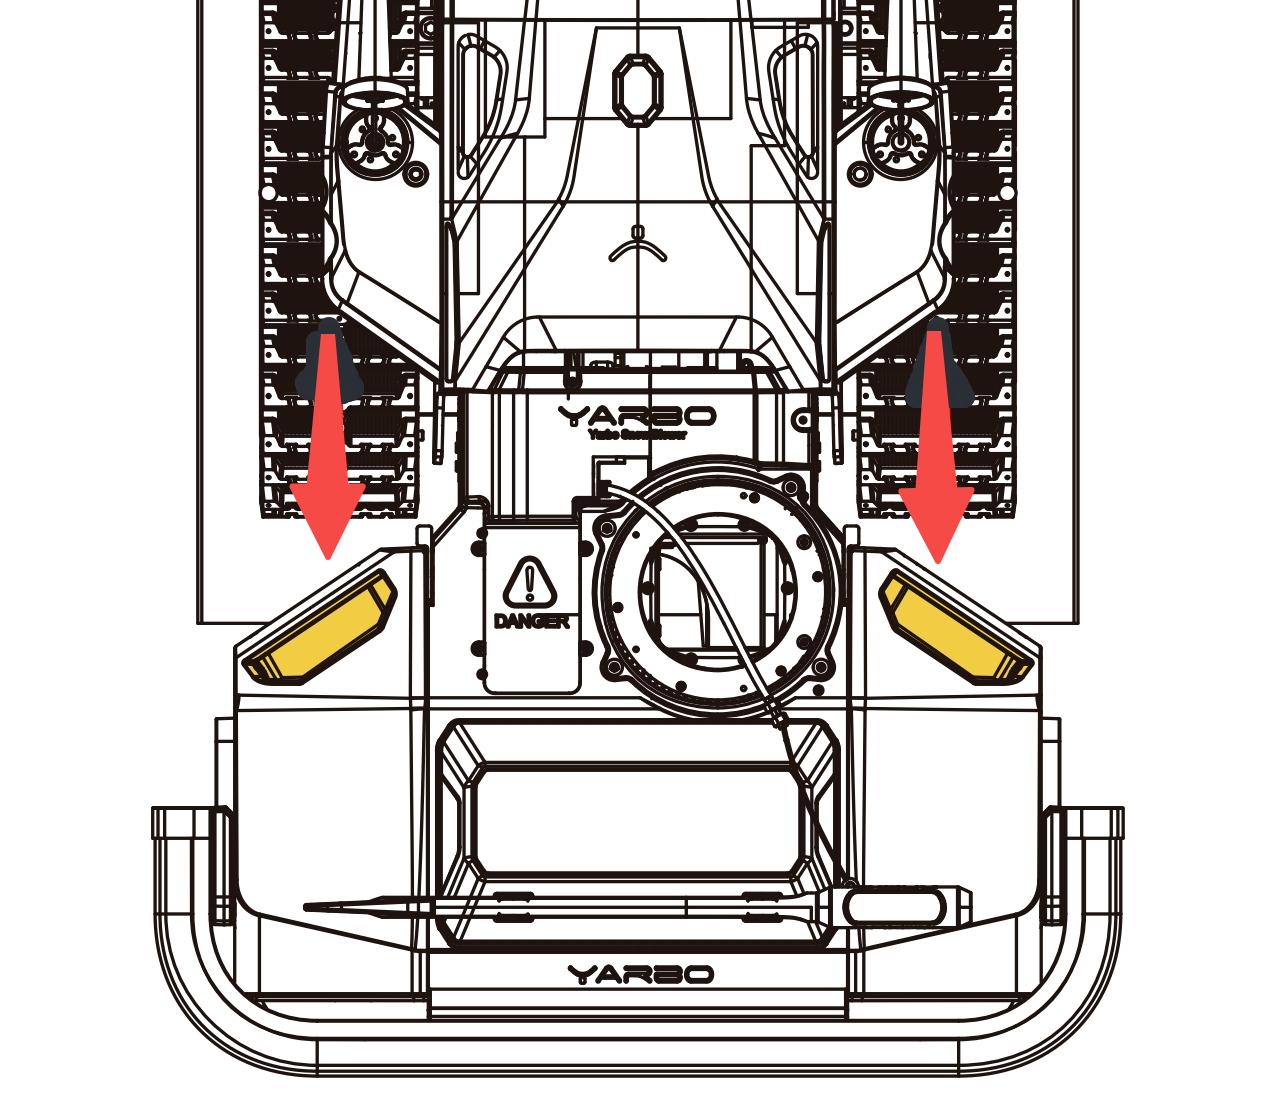 Ensuring that the protective cover with the Yarbo logo becomes visible once detached.
Step 3: Remove the protective cover
Use Allen Key #2 to unscrew and remove the protective cover that shields the power cable connection, as shown in the diagram. Ensure screw is loosened and the cover is completely detached before proceeding.
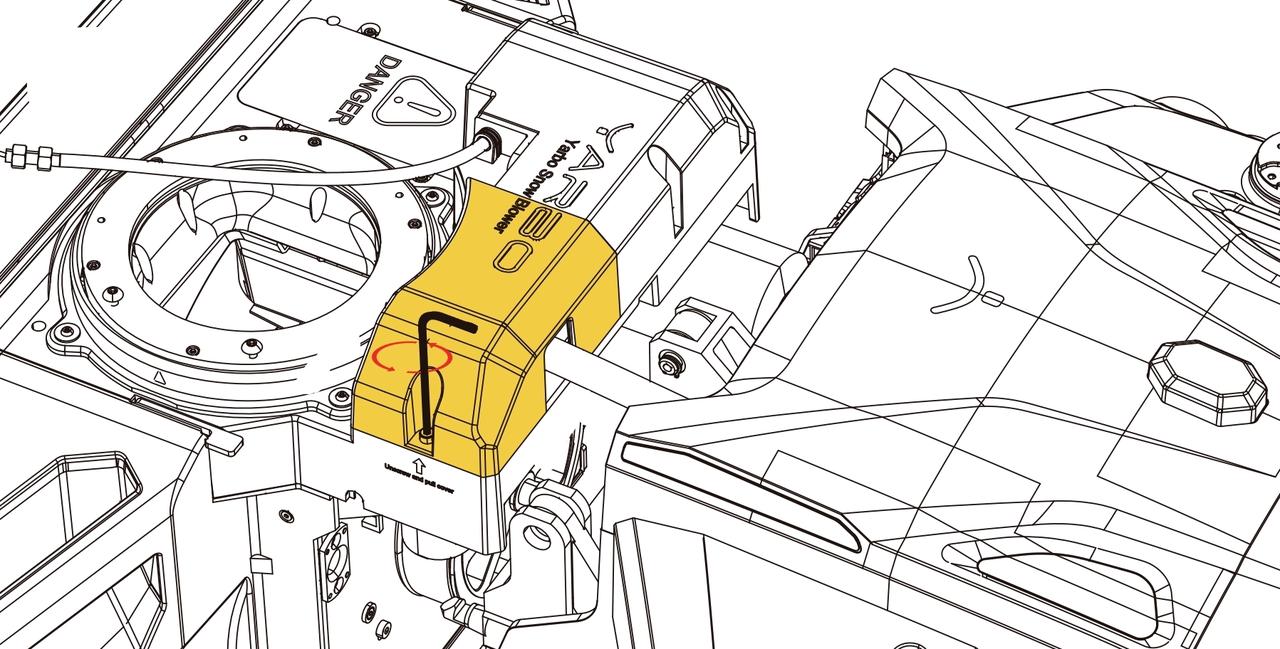 Unscrew and remove the protective cover
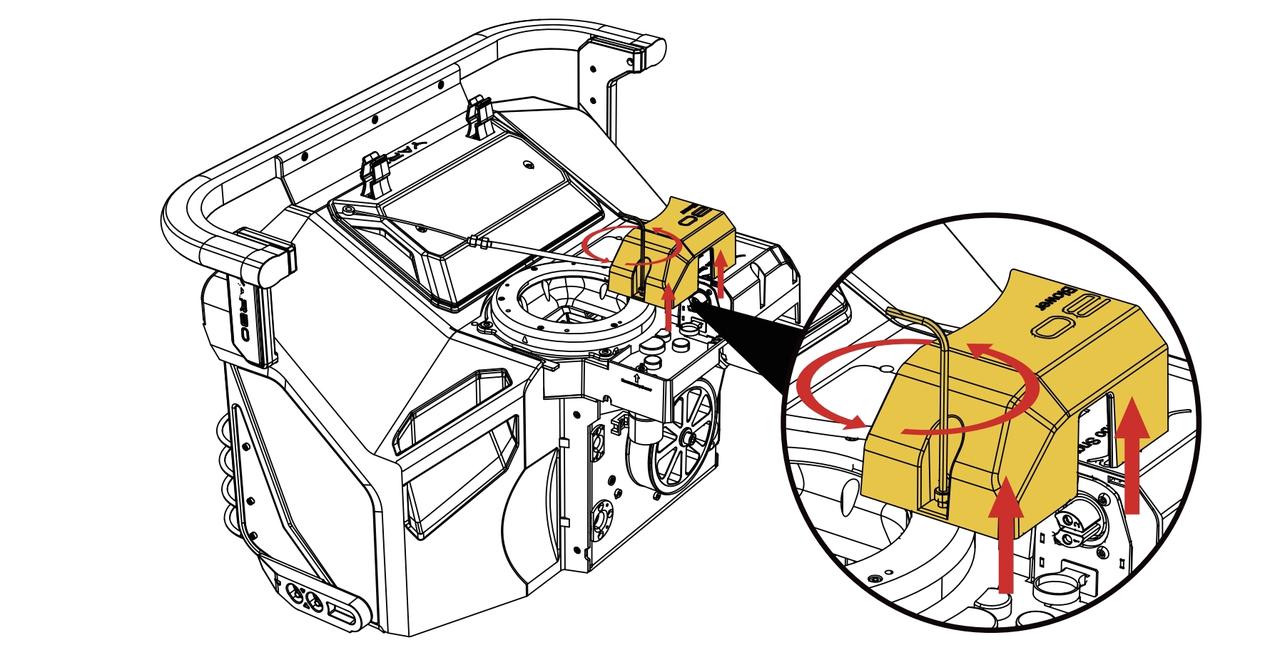
Step 4: Disconnect the power cable
To disconnect the power cable, first grip the circular ring at the connection point (the part highlighted in the image). Gently twist the ring to unlock the cable from its secured position. Once unlocked, carefully pull the cable out.
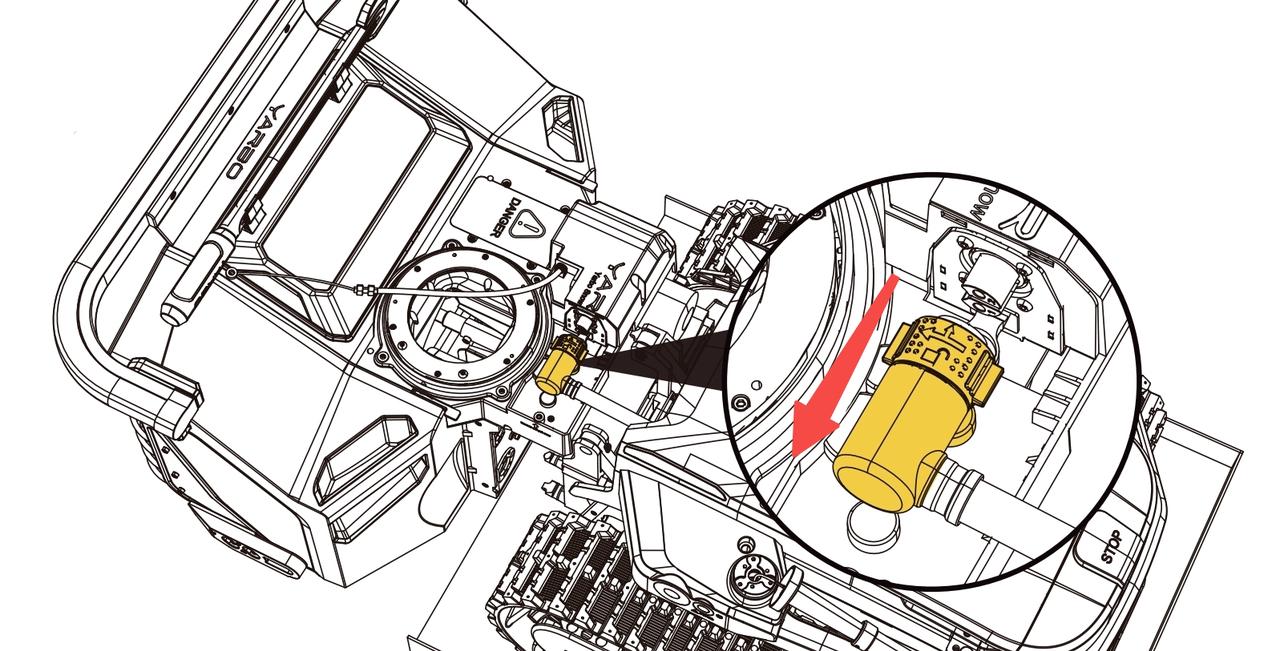 Twist the locking ring, ensuring no excessive force is applied to avoid damage.
Note: You can reinstall the protective cover removed in Step 3 for safekeeping.
Congratulations!
You have successfully removed the Snow Blower Module from your Yarbo Core. Please ensure that all components are stored safely and that no cables or connections are damaged during the process.
If you encounter any issues, please consult the troubleshooting section or contact customer support for further assistance.
Related Articles
[2024] Yarbo Snow Blower Quick Start Guide
Please download the attached file for the Quick Start Guide of the 2024 Snow Blower Mower.[2024] Yarbo Snow Blower User Manual
Note: This page is part of our legacy support content. Yarbo’s Knowledge Base has now moved to the new Yarbo Wiki. To access the latest user manual for the Snow Blower and stay up to date with all features and guides, please visit the Yarbo Wiki: ? ...[2024] How to Remove the Snow Blower Protection Fence
The protection fence on your Yarbo snow blower module plays an important role in keeping components safe during transport and basic operations. However, there may be instances where you need to remove it, such as for maintenance or to install the ...[2024] How to Replace Your Track to Fit the Snow
Welcome to the Yarbo Track Replacement Guide. This guide provides a step-by-step process for safely removing and replacing the tracks on your Yarbo Core. By following these instructions, you can ensure a smooth and safe replacement process without ...[2024] How to Remove Skid Shoes
Always turn off and disconnect your Yarbo before attempting any removal or maintenance task. Using Skid Shoes is an essential step to enhancing the Snow Blower Module's performance on uneven surfaces. It makes it possible for the snow blower to move ...